Recently I already wrote about Microsoft 365 across applications that can be ran in either Teams, Office (Microsoft 365) or Outlook. Since version 1.16 now it is also possible to develop and host those applications in SharePoint with SharePoint Framework (SPFx). So let’s dive into another sample application and show how this can be realized with SharePoint Framework (SPFx).
Series
- Pre – Modern SharePoint content type publishing
- Part I – A SharePoint document generator as Microsoft 365 app (yoteams)
- Part II – A SharePoint document generator as Microsoft 365 app (SPFx)
- Part III – A user configured Teams personal app with SPFx
- Part IV – SharePoint document review by search-based messaging extension in Outlook
Content
Setup
For the set up a standard react, SharePoint Framework web part needs to be scaffolded in the /teams folder where already two icons reside a manifest needs to be added manually. But therefore see the next section.
SharePoint content type
In a previous post, I already explained how to create a SharePoint content type either manually or in an automatic way. Here we want to use exactly this content type. So for details refer to the other post, but what’s essential is the placement of a custom document template inside hidden folder.
Teams manifest
With SharePoint Framework 1.16 it is not yet possible to create a Teams app manifest out of the box. This is usually done by pressing “Sync to Teams” in SharePoint app catalog. Currently the required version is not yet met, which is the manifest version 1.13 or above.
But it was always possible to create a manual app package for a SharePoint framework solution. The two necessary icons are already there and a Teams app manifest for a personal app only is created very quickly. The key part is the contentUrl of the staticTabs. Here the componentId has to match the id in the …WebPart.manifest.json
{
    "$schema": "https://developer.microsoft.com/en-us/json-schemas/teams/v1.13/MicrosoftTeams.schema.json",
    "manifestVersion": "1.13",
    "id": "570b5f8e-de6f-4c82-9892-3d9f24897aa4",
    "version": "1.0.0",
    "packageName": "OfferCreationSpFxWebPart",
    "developer": {
      "name": "Markus Moeller",
      "websiteUrl": "https://mmsharepoint.wordpress.com",
      "privacyUrl": "https://mmsharepoint.wordpress.com",
      "termsOfUseUrl": "https://mmsharepoint.wordpress.com"
    },
    "name": {
      "short": "Offer Creation (SPFx)",
      "full": "Offer Creation (SPFx)"
    },
    "description": {
      "short": "A personal M365 app to create custom offer documents",
      "full": "A personal Microsoft 365 app to create custom offer documents"
    },
    "icons": {
      "outline": "570b5f8e-de6f-4c82-9892-3d9f24897aa4_outline.png",
      "color": "570b5f8e-de6f-4c82-9892-3d9f24897aa4_color.png"
    },
    "accentColor": "#D85028",
    "configurableTabs": [],
    "staticTabs": [
      {
        "entityId": "108eec64-bd4b-4095-a02a-38ad1b2f848c",
        "name": "Offer Creation",
        "contentUrl": "https://{teamSiteDomain}/_layouts/15/TeamsLogon.aspx?SPFX=true&dest=/_layouts/15/teamshostedapp.aspx%3Fteams%26personal%26componentId=570b5f8e-de6f-4c82-9892-3d9f24897aa4%26forceLocale={locale}",
        "scopes": [
          "personal"
        ]
      }
    ],
Here now the matching part of the …WebPart.manifest.json:
{
  "$schema": "https://developer.microsoft.com/json-schemas/spfx/client-side-web-part-manifest.schema.json",
  "id": "570b5f8e-de6f-4c82-9892-3d9f24897aa4",
  "alias": "OfferCreationSpFxWebPart",
  "componentType": "WebPart",

The Form
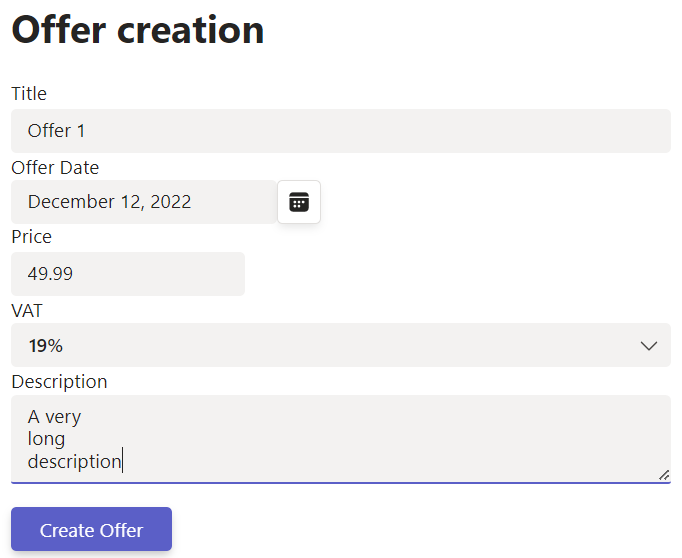
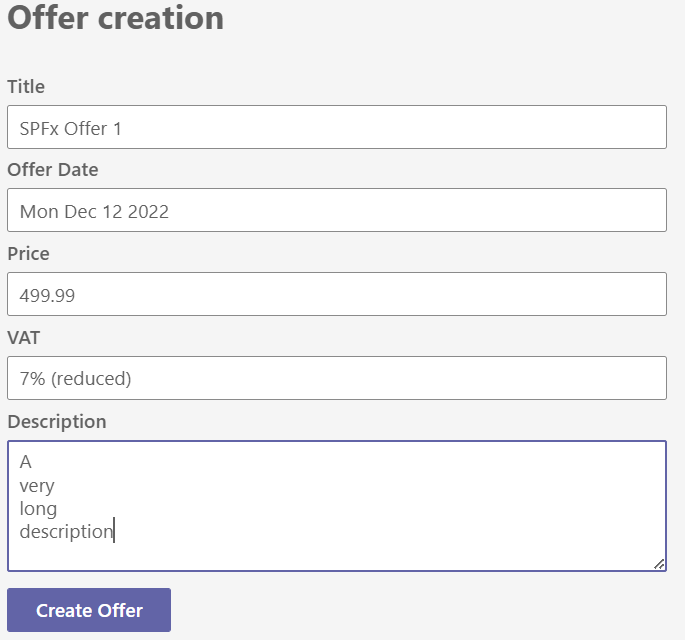
The form looks quite similar than in the previous yo teams solution. Only it is using FluentUI controls as included in SPFx by default. The functionality is the same. All controls handle their values in the state and on submit Button the values are sent to the backend.
SP service
To instantiate a custom offer document programmatically, four steps are necessary:
- Retrieve some configuration about the site where to store the offers
- Load the template
- Upload the new document
- Set the document’s metadata
For all these operations, the SharePoint rest API is used. Load the template, store as a document and adjust the metadata. This was the same in the previous post but here SPHttpClient is used. I am using SharePoint Rest API here because Microsoft Graph cannot access the file template in the hidden folder, yet (using a normal document in a standard library would work of course), and PnPJS doesn’t work well in a S-S-O solution like in the previous part. Here it would work brilliant but for comparability I stayed as close as possible.
Configuration with tenant properties
A site url is needed to know where to store the offer documents. This requests a configuration setting. In the Teams web application this simply can be stored in the app’s configuration settings. With SharePoint Framework this is a bit different. One option is to store it in the so-called tenant properties.
To identify the tenant as a good starting point the teamSiteDomain available from the teams context helps. This was already illustrated in the previous part but here it’s even more essential. In onInit getTeamSiteDomain is called which will first check if microsoftTeams SDK is available. If so, the app is running in either Teams, Office or Outlook. If not, it’s running in SharePoint only. In SharePoint, the site URL is directly grabbed from the property pane standard configuration instead. If this property is filled (only the case in SharePoint) it’s simply treated dominant.
protected onInit(): Promise<void> {
    return this.getTeamSiteDomain().then(domain => {
      this.teamSiteDomain = domain;
    });
  }
  private getTeamSiteDomain(): Promise<string> {
    if (!!this.context.sdks.microsoftTeams) { // running in Teams, office.com or Outlook
      return this.context.sdks.microsoftTeams.teamsJs.app.getContext()
        .then(context => {
          return context.sharePointSite.teamSiteDomain;
        });
    }
    const uri = new URL(this.context.pageContext.site.absoluteUrl);
    return Promise.resolve(uri.host);
}
Having the teamSiteDomain or SharePoint tenant url (and not a siteUrl respectively a blank one) next the url of the tenant app catalog can be retrieved. Having that, finally the corresponding tenant property can be retrieved. That is, the siteUrl where the offers shall be stored in.
private async getSiteUrl(tenantUrl: string): Promise<string> {
    const requestUrl: string = `${tenantUrl}/_api/SP_TenantSettings_Current`;
    const response = await this._spHttpClient.get(requestUrl, SPHttpClient.configurations.v1);
    const jsonResp = await response.json();
    const appCatalogUrl: string = jsonResp.CorporateCatalogUrl;
    if (appCatalogUrl && appCatalogUrl.length > 8) {
      const apprequestUrl: string = `${appCatalogUrl}/_api/web/GetStorageEntity('CreateOfferSiteUrl')`;
      const appResponse = await this._spHttpClient.get(apprequestUrl, SPHttpClient.configurations.v1);
      const jsonAppResp = await appResponse.json();
      const siteUrl: string = jsonAppResp.Value;
      return siteUrl
    }
    return "";
}
A personal configuration is also possible with SPFx but this is shown in another part of this blog series.
Load the template
This and the next section are quite similar than in the previous post. The same SharePoint rest API calls are executed. Still using OpenBinaryStream() and arrayBuffer() to retrieve the template from the hidden _cts folder where typiucally content type templates reside.
private async loadTemplate (offer: IOffer): Promise<IFile> {
    const requestUrl: string = `${this.teamSiteUrl}/_api/web/GetFileByServerRelativeUrl('${this.teamSiteRelativeUrl}/_cts/Offering/Offering.dotx')/OpenBinaryStream()`;
    const response = await this._spHttpClient.get(requestUrl, SPHttpClient.configurations.v1);
    const fileBlob = await response.arrayBuffer();
    const respFile = { data: fileBlob, name: `${offer.title}.docx`, size: fileBlob.byteLength };
    return respFile;
}
Store as new document
Nothing special in the file storage function anymore. The only result of interest is the file’s ServerRelativeUrl:
pprivate async createOfferFile(tmplFile: IFile): Promise<string> {
    const uploadUrl = `${this.teamSiteUrl}/_api/web/GetFolderByServerRelativeUrl('${this.teamSiteRelativeUrl}/Shared Documents')/files/add(overwrite=true,url='${tmplFile.name}')` ;

    const spOpts : ISPHttpClientOptions  = {
      headers: {
        "Accept": "application/json",
        "Content-Length": tmplFile.size.toString(),
        "Content-Type": "application/vnd.openxmlformats-officedocument.wordprocessingml.document"
      },
      body: tmplFile.data
    };
    const response = await this._spHttpClient.post(uploadUrl, SPHttpClient.configurations.v1, spOpts);
    const jsonResp = await response.json();
    return jsonResp.ServerRelativeUrl;
}
File and metadata operations
As till here only the file was dealt with now it’s time to switch to the ListItem with metadata. This works well with the /ListItemAllFields endpoint of the file. Needed for an update next are itemID and @odata.type.
private async getFileListItem(fileName: string): Promise<any> {
    const requestUrl = `${this.teamSiteUrl}/_api/web/GetFileByServerRelativeUrl('${this.teamSiteRelativeUrl}/Shared Documents/${fileName}')/ListItemAllFields`;
    const response = await this._spHttpClient.get(requestUrl, SPHttpClient.configurations.v1);
    const jsonResp = await response.json();
    const itemID = jsonResp.ID;
    return { id: itemID, type: jsonResp["@odata.type"].replace('#', '') };
}
private async updateFileListItem(itemID: string, itemType: string, offer: IOffer): Promise<any> {
    const requestUrl = `${this.teamSiteUrl}/_api/web/lists/GetByTitle('Documents')/items(${itemID})`;
    const spOpts : ISPHttpClientOptions  = {
      headers: {
        "Content-Type": "application/json;odata=verbose",
        "Accept": "application/json;odata=verbose",
        "odata-version": "3.0",
        "If-Match": "*",
        "X-HTTP-Method": "MERGE"
      },
      body: JSON.stringify({
        "__metadata": {
            "type": itemType
        },
        "Title": offer.title,
        "OfferingDescription": offer.description,
        "OfferingVAT": offer.vat,
        "OfferingNetPrice": offer.price,
        "OfferingDate": offer.date
      })
    };
    const response = await this._spHttpClient.post(requestUrl, SPHttpClient.configurations.v1, spOpts);
    if (response.status === 204) {
      return Promise.resolve();
    }
    else {
      return Promise.reject();
    }
  }
Finally the metadata values can be updated with the values collected in the form. Having the itemID and @odata.type there is no big surprise anymore. Maybe only to highlight the "X-HTTP-Method": "MERGE" inside the Header of the POST request. (For those, like me, who do not deal with SP Rest API daily, anymore)
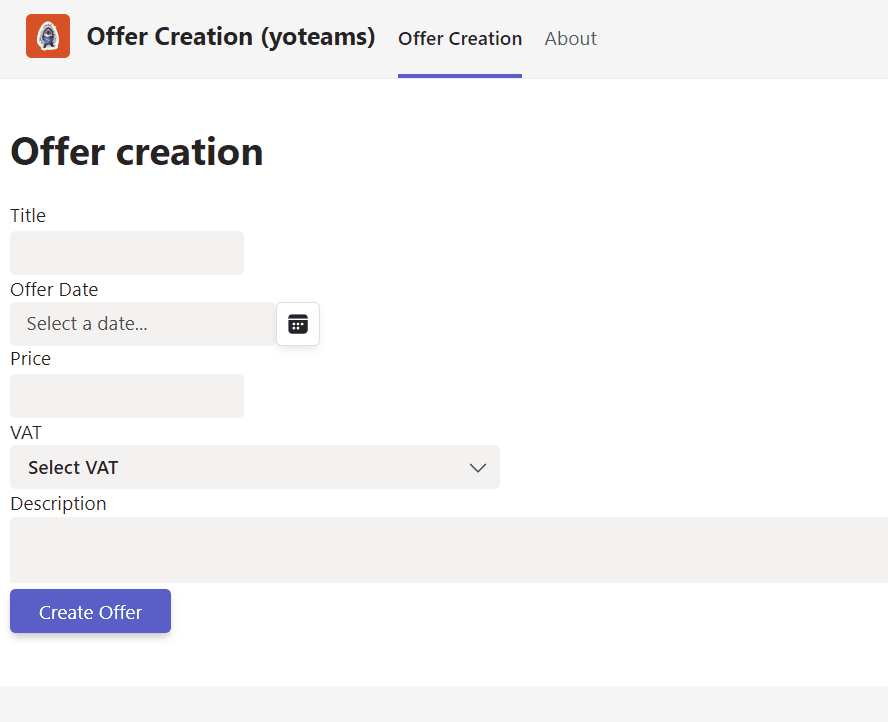
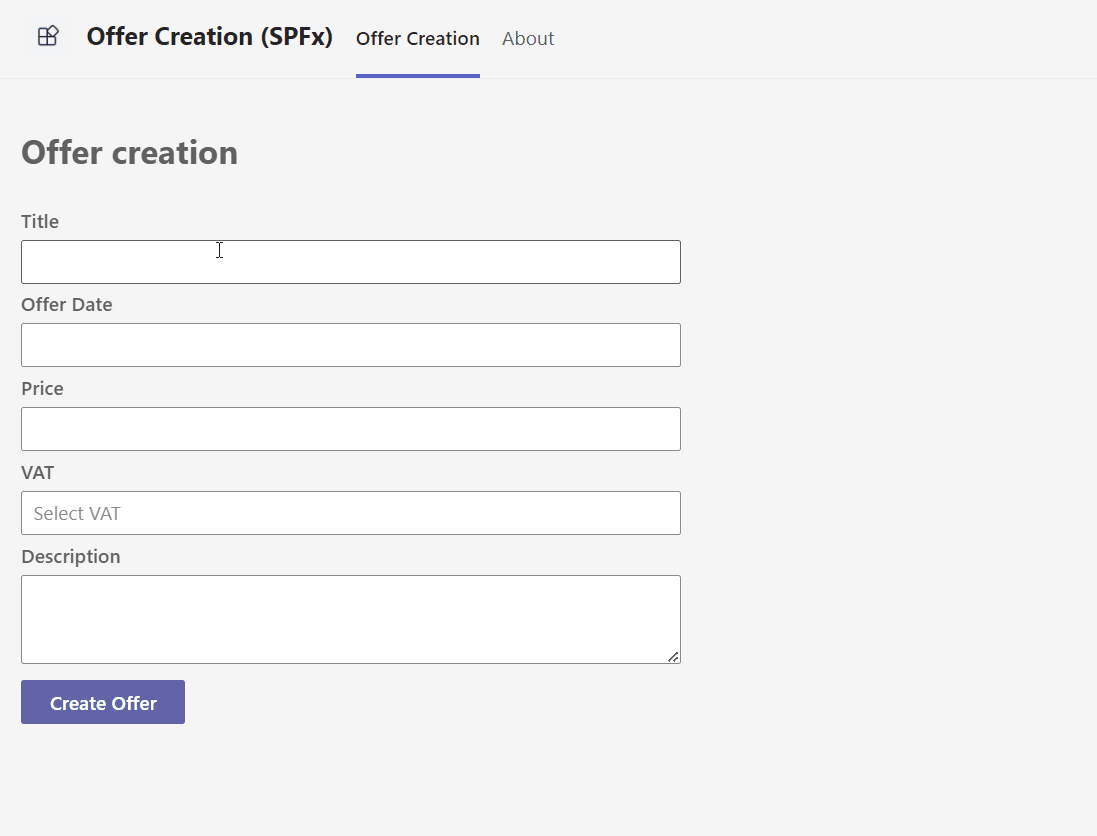
All in all the app in action looks like this:
In this post the key parts of the solution were highlighted and illustrated. Nevertheless for your reference you can find the whole solution in my GitHub repository. As mentioned above I will come back with a next post on how to personally configure this web part when used as a M365 application (in Teams, Outlook, Office) with another web part dedicated for configuration only. Also I will extend the parallel yo teams sample with a search-based messaging extension for further steps inside Teams or Outlook, which unfortunately currently has no pendant in SPFx.

|
Markus is a SharePoint architect and technical consultant with focus on latest technology stack in Microsoft 365 Development. He loves SharePoint Framework but also has a passion for Microsoft Graph and Teams Development. He works for Avanade as an expert for Microsoft 365 Dev and is based in Munich. In 2021 he received his first Microsoft MVP award in M365 Development for his continuous community contributions. Although if partially inspired by his daily work opinions are always personal. |